Create a card design with our company badge maker
BadgeMaker Design, ID Card Software

Design your employee ID with our company card design software

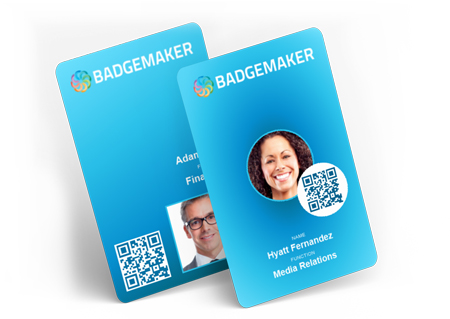
Creating stunning professional employee IDs has never been easier thanks to our company card design software BadgeMaker Design, a core component of BadgeMaker. With BadgeMaker Design, you can create professional card designs tailored to your specifications, including backgrounds, dynamic fields, shapes, images, barcodes, signatures, and passport photos.

Step 1: Create a New Card Design

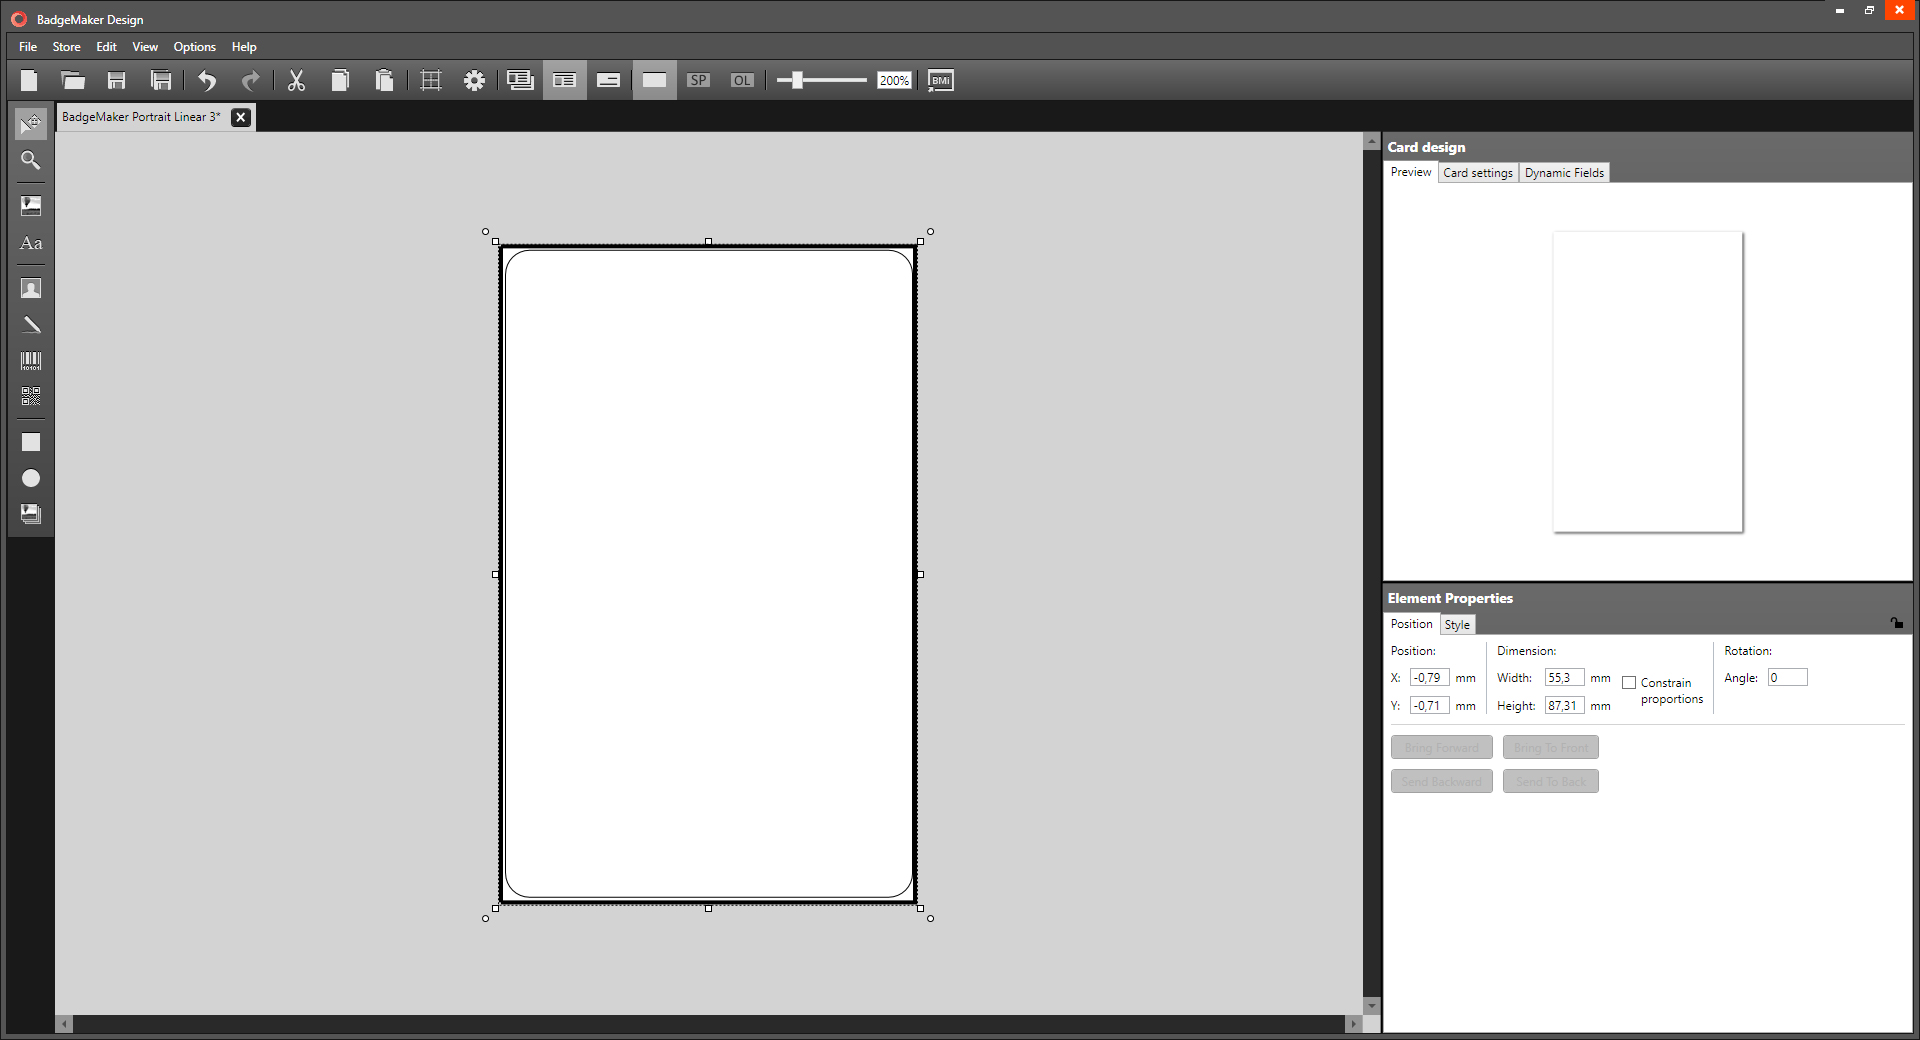
Start by launching BadgeMaker Design and initiating a new card design. Set your design preferences, including card format (standard CR80 or custom), single- or double-sided layout, Magstripe options, and portrait or landscape orientation.

Step 2: Add Background & Logo

Next, customize your card design with a background and logo. Choose from a selection of pre-designed backgrounds or create your own using the shape or image tool. Incorporate your company’s identity by adding your logo with ease. Simply use the image tool, click on the canvas, and select your logo image. Resize the logo as needed using the corner handlers.

Step 3: Incorporate Static & Dynamic Text

With the foundation of your design in place, it’s time to add text. Whether you need static text for simple designs like gift cards or dynamic text for cards with personalized information, BadgeMaker Design makes it simple. Maintain a consistent layout while accommodating variable data for each printed card.

Step 4: Personalize with Photos & Signatures

Take your card design to the next level by adding ID photo and signature placeholders. These placeholders automatically link to the cardholder ID photos and signatures in your BadgeMaker Identity project, ensuring seamless personalization.

Ready to get started? Download BadgeMaker today and unlock the power to create stunning card designs effortlessly!

Read More
BadgeMaker Design Gradients
BadgeMaker Design, ID Card Software

BadgeMaker Design Gradients: How to add multi-color gradients to your card design

BadgeMaker Design Gradients – Thank you for choosing the card design software BadgeMaker, this post shows you how to add a gradient background or other shapes to your card design.

BadgeMaker Design: Multi-color gradients

Step 1. Add a shape element to your card design

To add a gradient background to your card design, select the shape tool and click on the card. Resize the shape to cover the complete background of the card. Go to the “Style” tab in the element properties and set the line thickness to “0”.

BadgeMaker Shape element
BadgeMaker Design -Add a shape as background

Step 2. Change the Shape color to a linear multi-color gradient

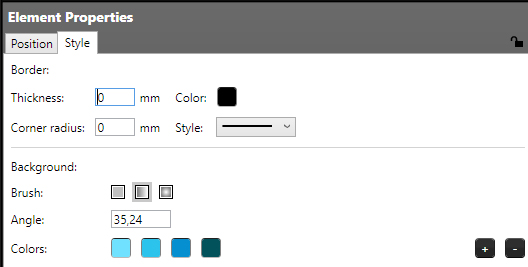
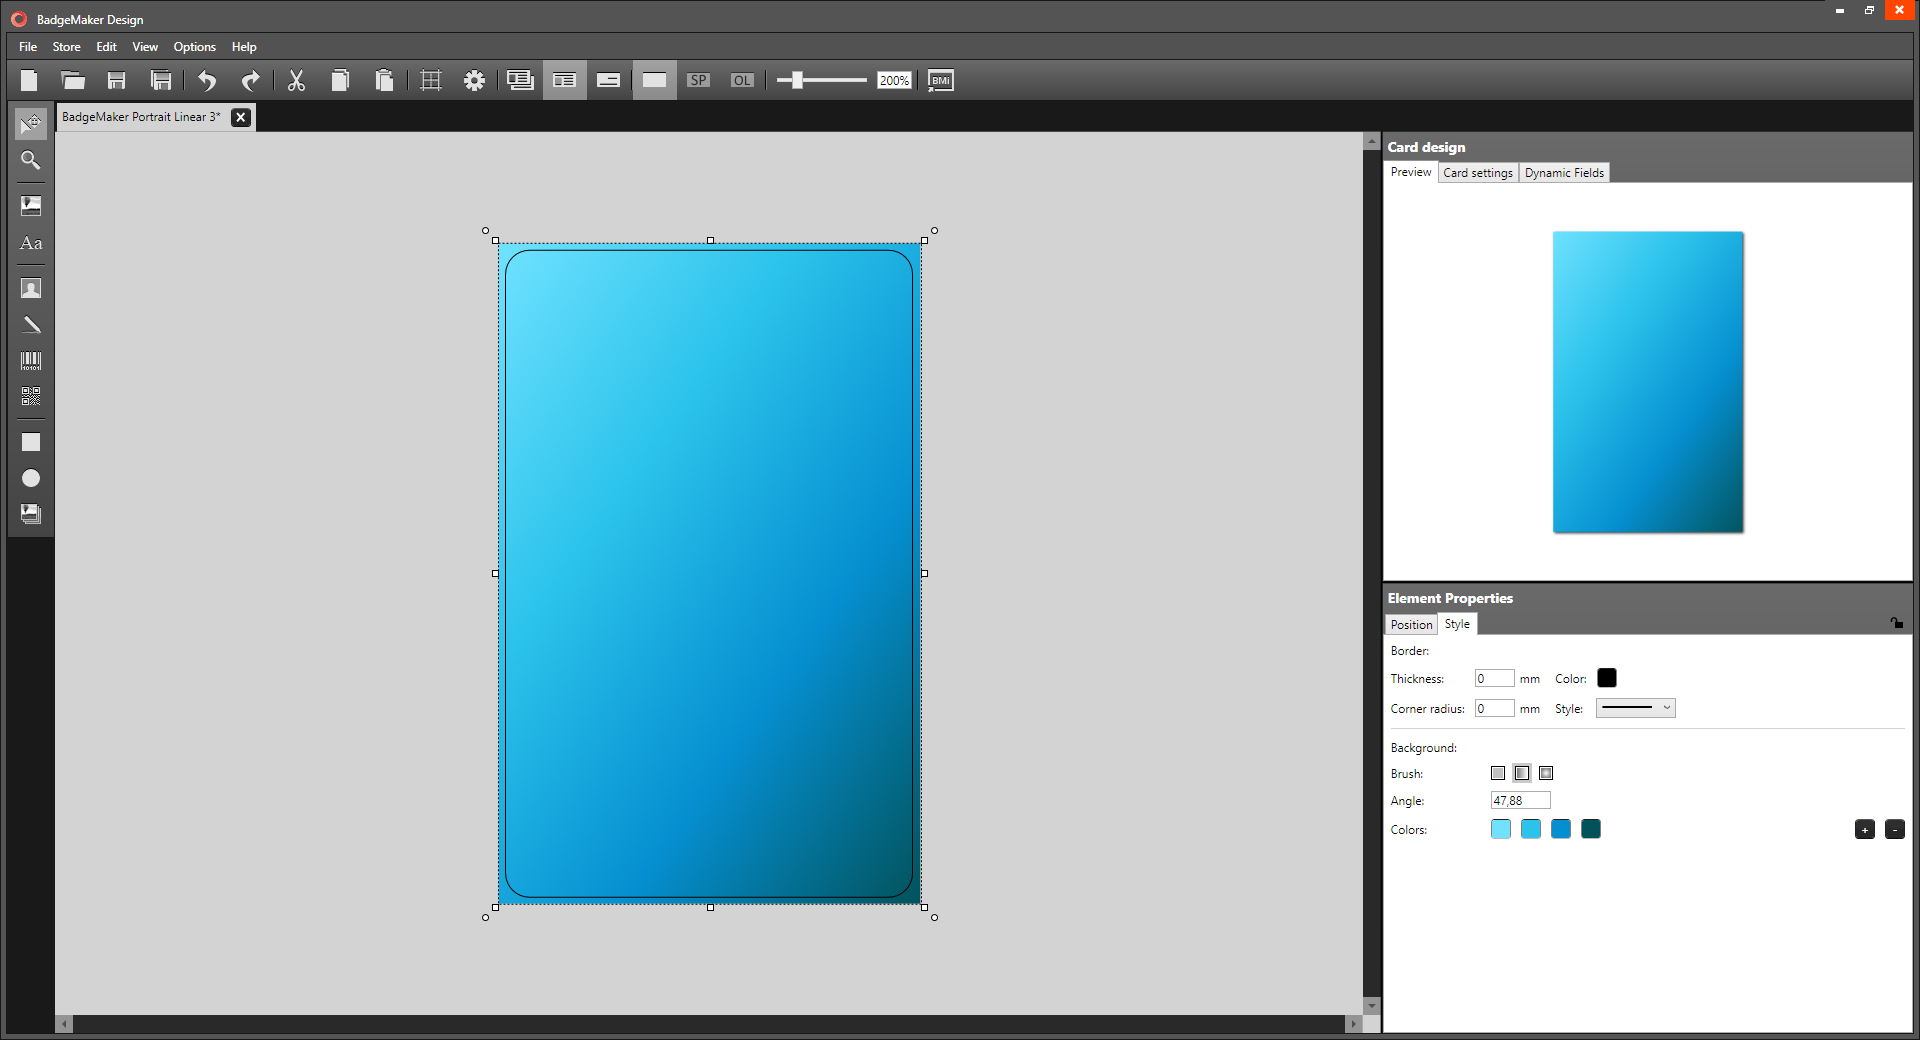
The background color of an element can be one color or a multicolor gradient color linear or radial. Click on the linear gradient icon to create this gradient, set the angle of the linear gradient in degrees and click on the “+” button to add more colors to the gradient. To select a different color click on the color box you want to change.

Create gradients under the style tab in element properties

Linear Gradients
BadgeMaker Design with multi-color gradient

Step 3. Change shape color to a radial multi-color gradient
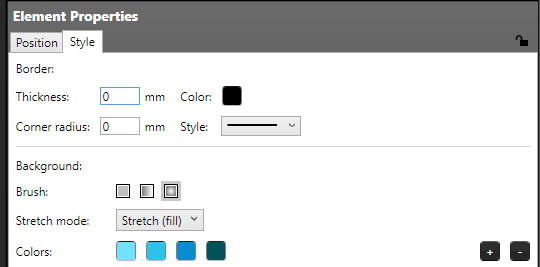
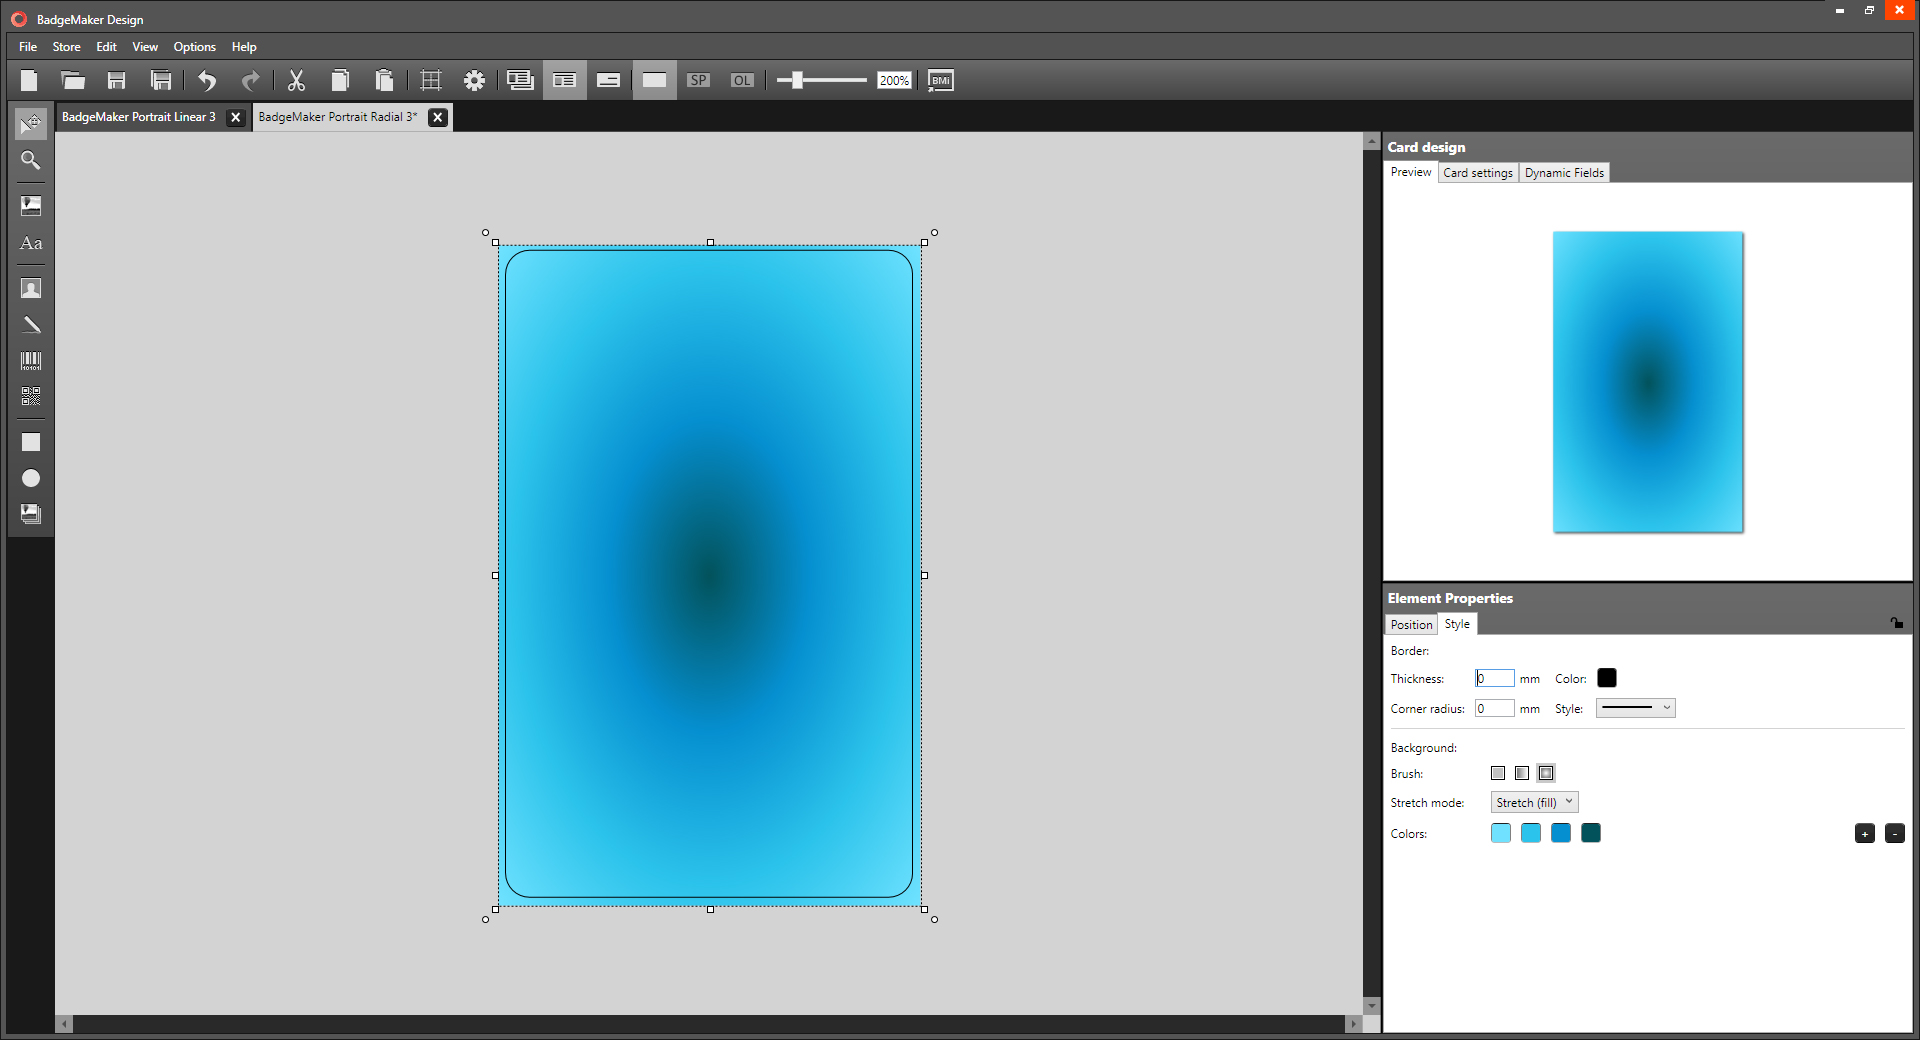
Click on the radial icon to change the gradient to a circle. Select how you would like to stretch the gradient using the stretch mode.

BadgeMaker Design create radial gradient in element properties

Start creating Badgemaker design gradients now.

Radial Gradient
BadgeMaker Design with a Radial Gradient
Read More
Employee Badge Maker: Add new record
BadgeMaker Identity, ID Card Software

BadgeMaker Identity: How to add a record manually

Thank you for choosing the employee badge maker software: BadgeMaker. This post shows how to add a record manually in BadgeMaker Identity. Records are single data rows that contain information of one person. There is a button for adding and deleting a single record manually. To add multiple records, you can choose to import an Excel file.

First step is open a existing project in BadgeMaker Identity.

BadgeMaker Identity

Step 1. Add a new record

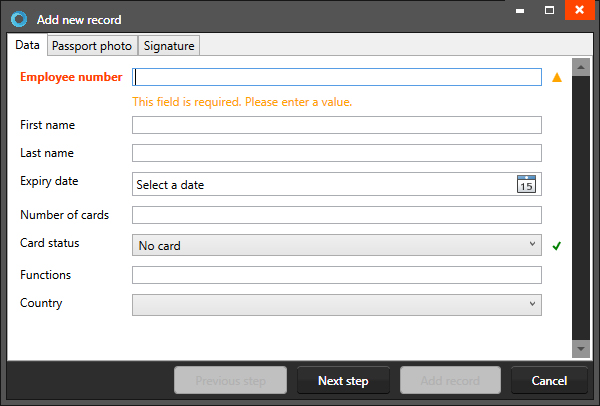
Click on the new record button in the Quick menu, the pop-up window with entry form allows the user to add data and Capture a Photo and Signature.

Enter the needed information for each field and click on the “Next Step” button to add a photo.

Employee Badge Maker: add a record icon
Employee Badge Maker: add a record pop-up

Step 2. Add a photo to the record

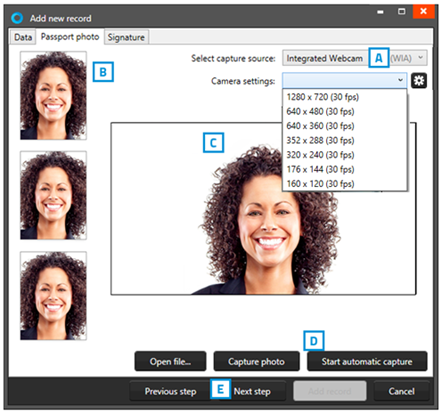
A. Select the source of camera you want to use from the drop-down menu. You can choose to use your webcam or a TWAIN camera that is installed and connected to your computer.

B. Click on the “Start automatic capture” button. The application will detect your face automatically and take three pictures. You can select one of the three pictures to add to the new record.

C. The Photo functionality will show you the camera view.

D. Click on the “Capture photo” button. The Photo functionality will show you the camera view. You are also able to upload an image from your computer. Click on the “Open file…” button to select an image from a file.

Step 3. Add a Signature to your new record

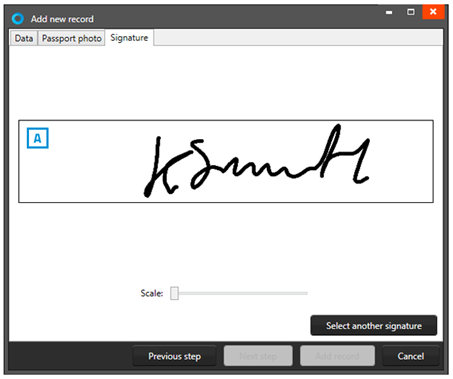
Use a connected signature pad to write a signature into this field or select a signature from file. Scale the signature using the slider.

We have added all the needed data for this record and can now add the record to this project. Connect the record to a card design and print the card in the employee badge maker.

Read More
BadgeMaker How to add a new project
BadgeMaker Identity, ID Card Software

BadgeMaker Identity: How to start a new project

Thank you for choosing the id badge maker software: BadgeMaker. This post shows you how to create a new project in BadgeMaker Identity. Start a new project and add or import card holder data, connect your card designs, add triggers and print your cards.

BadgeMaker Identity

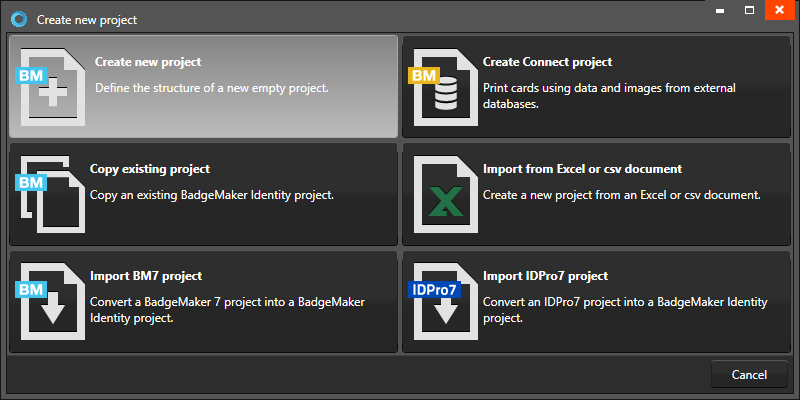
First step is to click on the BadgeMaker Identity icon to start the software for managing your data and print your cards. Go to “File” in the main menu and click on “New” or click on the icon in the quick menu. Now click on the “New project” link or button and select one of the six options to start a new project.

Step 1. Start a new BadgeMaker project

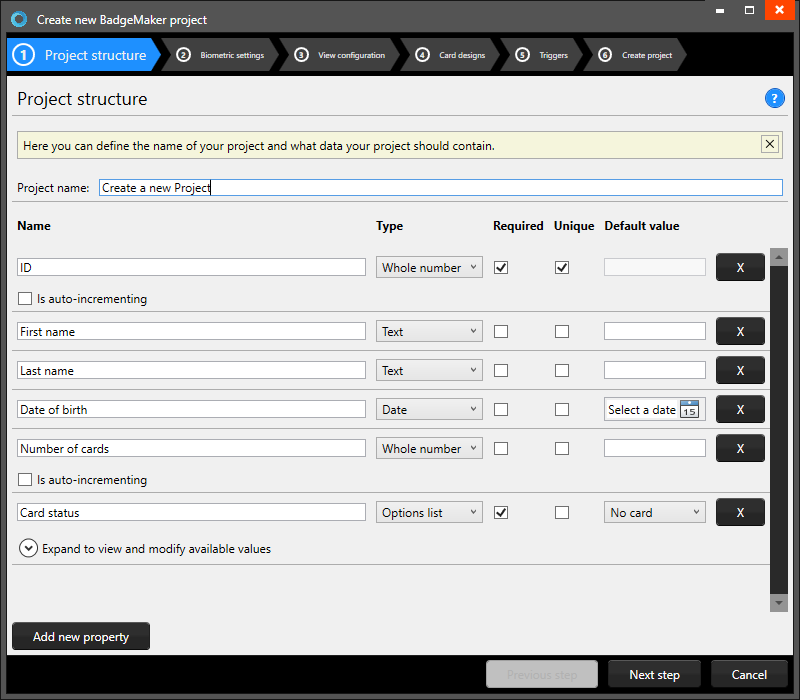
Click on “Create a New Project” if you want to begin with a blank data grid and setup your own data columns.

Start with the setup of your project structure. The software offers you a couple of default data columns. Change or delete the columns you do not need and add columns to your liking.

Give your new project a name and add the needed data columns. We will add the data fields you also use in your Card Design.

The first data column will represent a unique number to identify a specific card holder. We will name the database field Employee number, set the data type to number and check the boxes to make this data field “Required” and “Unique”.

We will keep the Firstname, Lastname, number of cards and card status. Change the date of birth column to expiry date and add a new column for the “Functions”. Click on the “Add new property” button and give it the Functions name and add Country.

With the default input field, you can add a standard value to your data field, empty fields and new records will automatically get the default value you add to this data field.

Click on the “X” button to delete a data column from the project structure setup.

Click on the “Next step” button to go to step 2.

BadgeMaker Create new Project -id badge maker
ID Badge Maker Create a new project - id badge maker

Step 2. Add biometric data to your project

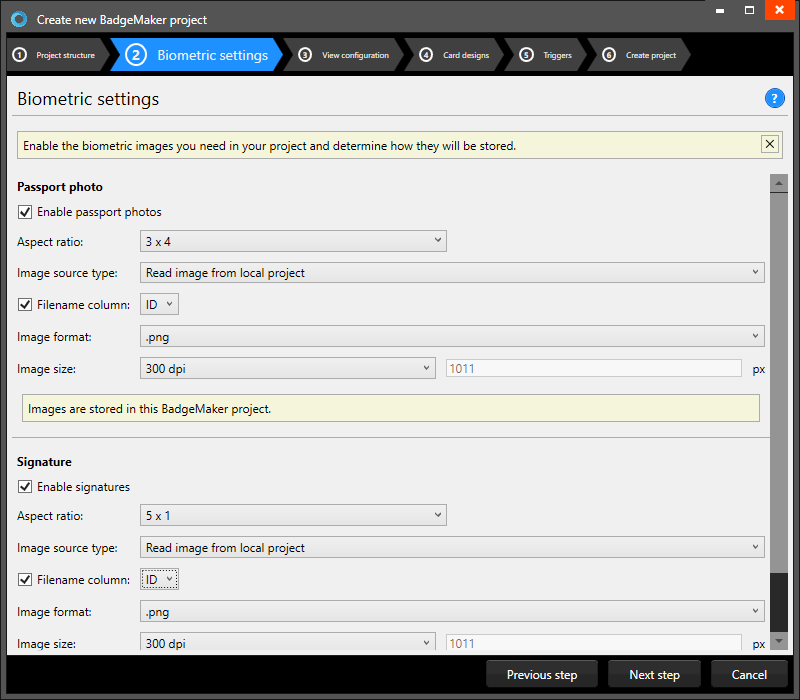
Enable the biometric images you need in your project and determine how they will be stored.

The box for ID photos makes photos visible in the project and enables you to add photos. After checking the box, determine the ratio of the photo.

Select how and where photos will be saved within your project. Check this box if you want to use data columns to represent the filename of the photos saved in this project.

Select the format (png, jpg or bmp) and size, the image needs to be saved as.

The box for the signature makes signatures visible in the project and enables you to add signatures. The signature section works the same as the Passport photo section mentioned earlier.

Step 3. Setup the view configuration

Click on the “Next step” and choose for the default configuration or adjust the setup for Detailed and Gallery view.

ID Badge Maker Add new Project step 2 Biometrics

Step 4. Add Card Designs

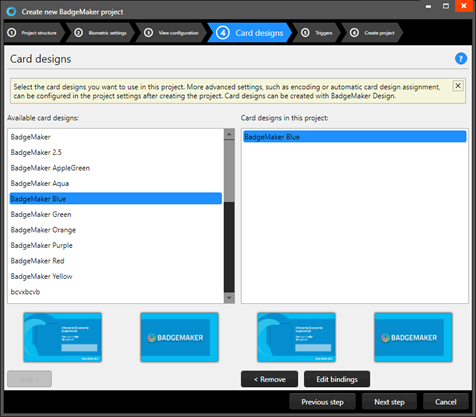
Step 4. allows you to add card designs to your new project.

Select one of the available designs. Click on the “Add” button to add the design to your project. If you want to remove a design from your project, select one of the designs in this list and click on the remove button to delete the selected design from your project.

Select a design and then click on the “Edit bindings” button if you want to edit the bindings for the dynamic data of the card design.

The data binding tool is a powerful option in BadgeMaker Identity. When you add a new layout or update a layout you will be prompted to create the data bindings. Dynamic fields used and created in your layout may differ from the naming or spelling of a name that exists in your Project database. Therefore, you will be allowed to create the data bindings. The dynamic fields that are created in the layout are presented to the left and you can bind these dynamic fields to the database fields. The tool will create the bindings for you that are obvious: if they are the same or as they were bonded at the previous update; of course, you will be able to modify the bindings and confirm these settings. The new or modified layout will be available in the dashboard of BadgeMaker Identity.

Step 4 select card designs - id badge maker

Step 5. Setup triggers for your ID badge maker project

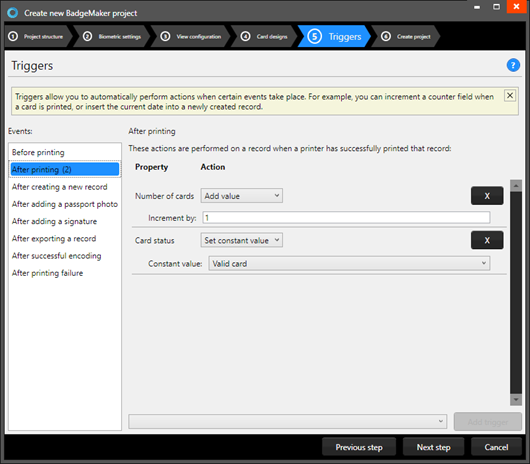
Step 5. Allows you to setup triggers for your project. Triggers can be used to automatically change data in your project on a certain condition or event.

A new project like we are creating has a couple of standard data columns connected to triggers that are also setup by default. For this project we will keep the default triggers. The number of cards will add value and increment by 1 after printing. The card status will automatically change to “Valid card” after printing.

Click on the create project and the new structure is ready. Now add data manually or import data.

Thank you for choosing id badge maker: BadgeMaker

Step 5 set triggers - id badge maker
Read More
Add a photo, signature and Dynamic logo with id card maker BadgeMaker
BadgeMaker Design, ID Card Software

BadgeMaker Design: How to add a passport photo, signature and a dynamic logo

Thank you for choosing the ID card maker BadgeMaker, this post shows you how to use placeholders for dynamic data like an ID photo, signature or a dynamic logo in your card design.

Step 1. Add an ID photo placeholder

To personalize a card, you can add a placeholder for an ID photo, that is automatically linked to the card holders’ ID photo’s in your BadgeMaker Identity project.

Click on the ID Photo tool in BadgeMaker Design and click on the front of the card. Resize the ID photo element to your liking. You can add a border to frame the photo. Go to Element Properties, click on the style tab and change the border thickness.

Add photo to ID card maker BadgeMaker
Add photo to id card maker BadgeMaker

Step 2. Add a Signature placeholder

A signature placeholder can also be added to your card design. The signature placeholder is also linked to the cardholders’ signatures in your BadgeMaker Identity project. The placeholder shows a dummy signature. Click on the signature tool and then click on frontside of the card. Resize the placeholder to the needed size and drag it to the correct location for your card design.

Add signature placeholder
Add Signature Placeholder in id card maker BadgeMaker

Step 3. Add a Dynamic logo

Click on the Dynamic logo tool in the BadgeMaker Design toolbar, click on the card in the canvas and go to the first tab of the “Element properties”. Select the dynamic field representing the needed data for the dynamic logo.

Keep the aspect ratio and keep the interpolation mode set to default. Now add the dynamic logos, the images need to represent four countries so add four images. Click on the “” button to select the flag images.

To get the correct flag to appear with the correct card holders’ country, add the associated value. This value needs to be the exact value corresponding with the data in the project. We will add USA, CA, UK and NL.

Do not forget to save the card design. You are now ready to use your card design in BadgeMaker Identity and create a project with card holders.

Thank you for choosing id card maker: BadgeMaker

Add Dynamic Logo
Add Dynamic logo in id card maker BadgeMaker
Read More